With Hurricane Milton approaching and many still recovering from the impacts of Hurricane Helene, we want to ensure you have access to vital tools to maintain communication during these challenging times. To help, we are providing a guide that details how to enable Call Forwarding on your Business Numbers for those using ClearlyIP SIP Trunking or the Clearly Cloud PBX platform.
Options For ClearlyIP SIP Trunking Customers
- Enable Immediate Call Forwarding: Redirect all calls to another number immediately.
- Call Forwarding when unreachable: Automatically forward calls when your local, self-hosted, or Business Connect PBX is not reachable by our SIP Trunking platform.
Options For Clearly Cloud Customers
- Enable Follow Me Calling: Manage call routing using the Web Control Panel.
- Enable Immediate Call Forwarding: Forward calls directly to a chosen destination, bypassing the Cloud PBX entirely. This option is especially useful if your office is without power or offline for any reason.
Additionally, you can continue using Clearly Anywhere softphone applications. However, please be aware that mobile internet capacity may be affected in areas with infrastructure damage or high traffic due to evacuation efforts.
For detailed instructions on setting up call forwarding, please refer to the guide below.
Should you need any assistance, don’t hesitate to contact our support department or reach out to your dedicated account manager.
We hope you and your loved ones remain safe during these times. Thank you for trusting ClearlyIP for your communication needs.
Call Forwarding Guide
1.
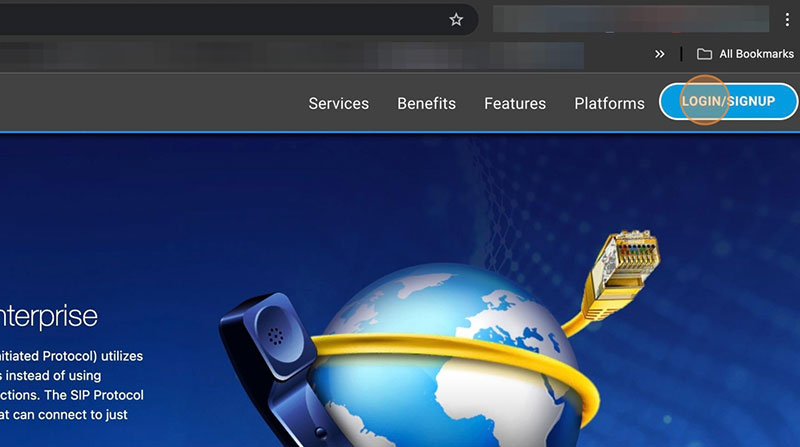
Visit trunking.clearlyip.com or cloud.clearlyip.com and click on “LOGIN/SIGNUP”
2.
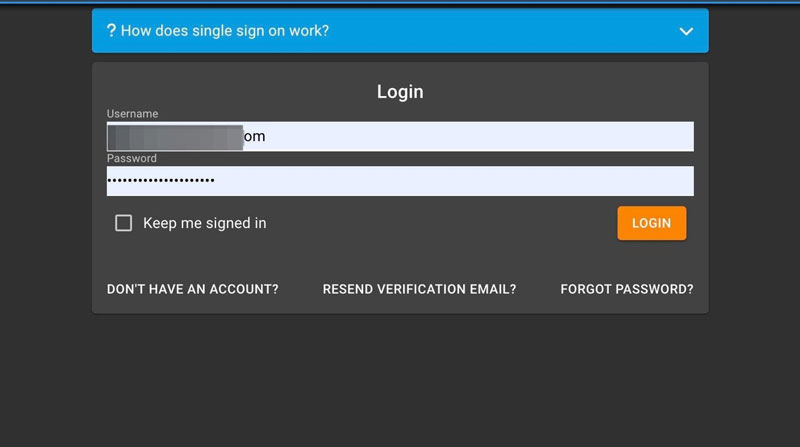
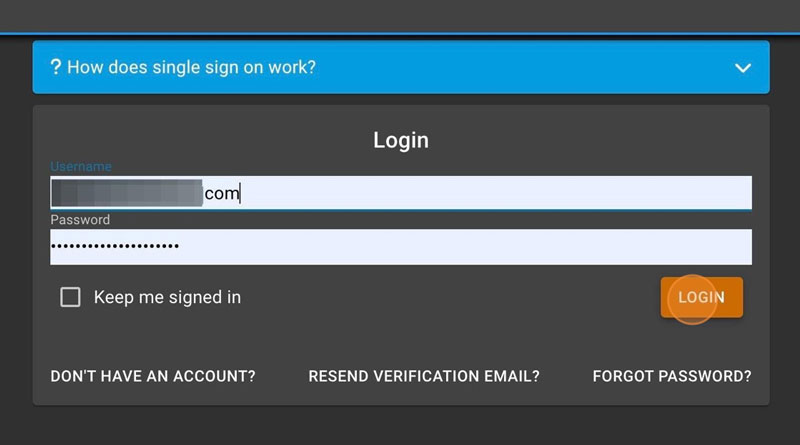
Enter Username and Password
3.
Click “LOGIN”
4.
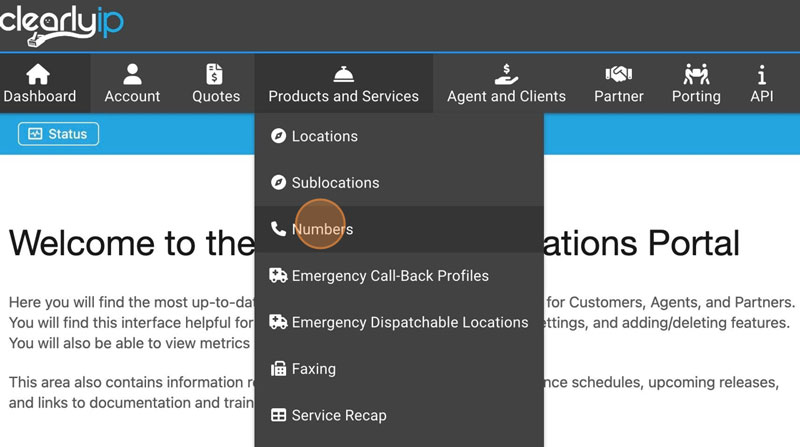
Under “Products and Services”, enter the Numbers Menu
5.
Find the number you want to edit, and click on the binoculars/view button

6.
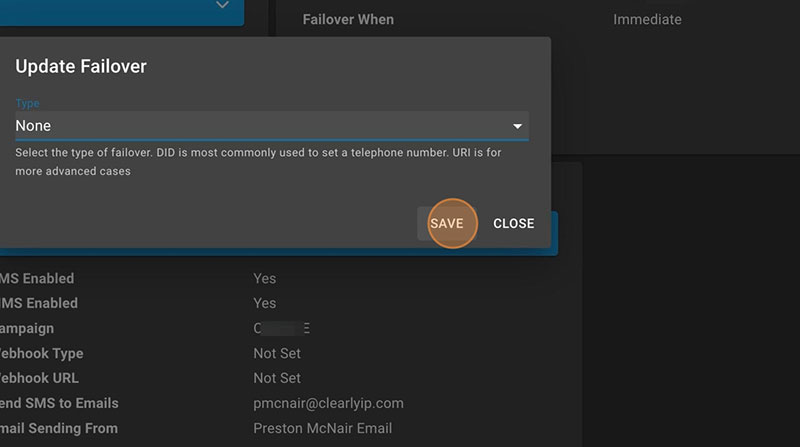
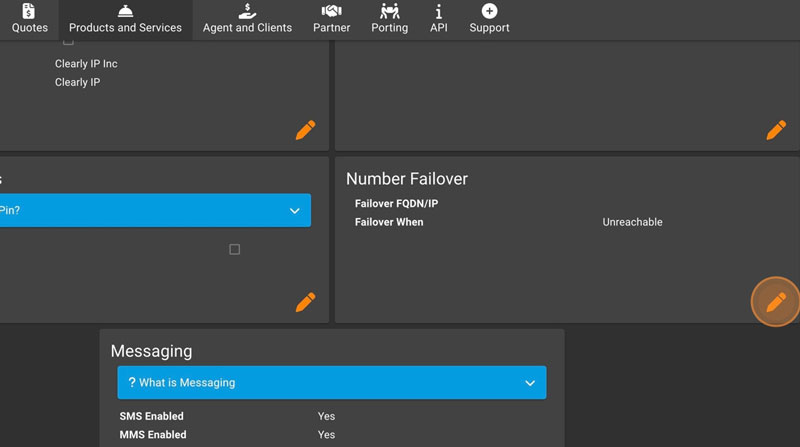
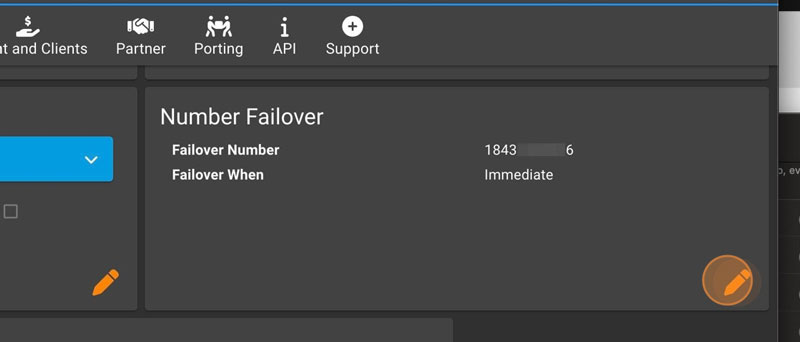
Under Number Failover, click on the Edit Icon
7.
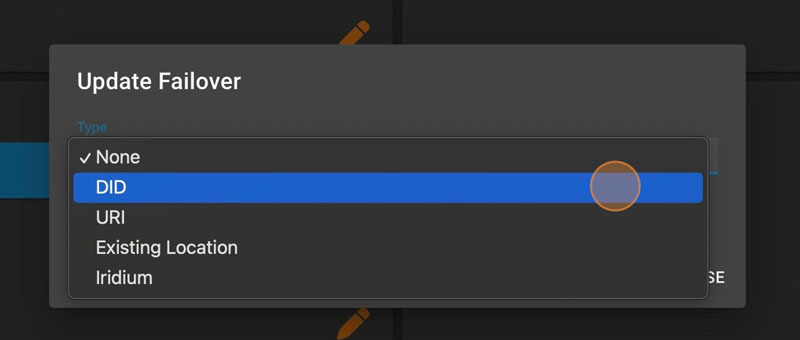
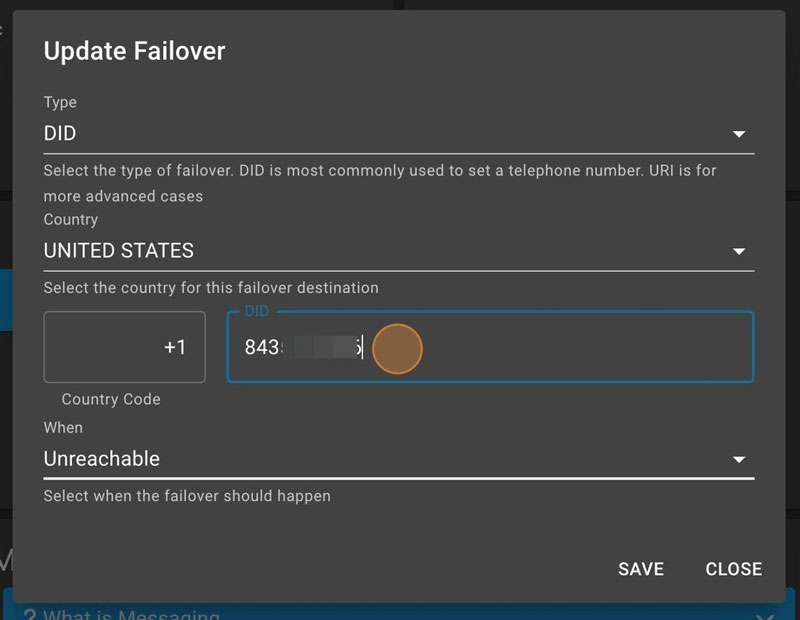
Click “DID”
8.
Click “DID”
9.
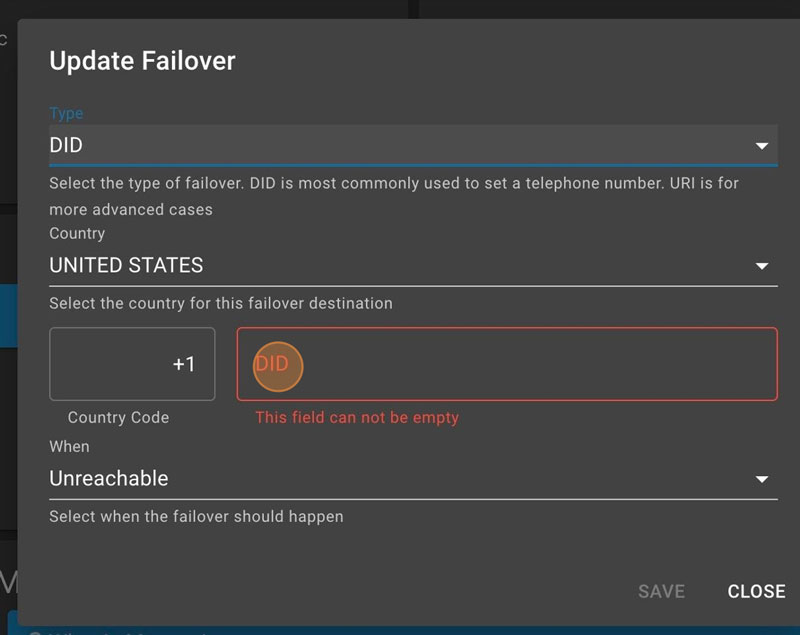
Type the phone number you want to forward your calls to.
10.
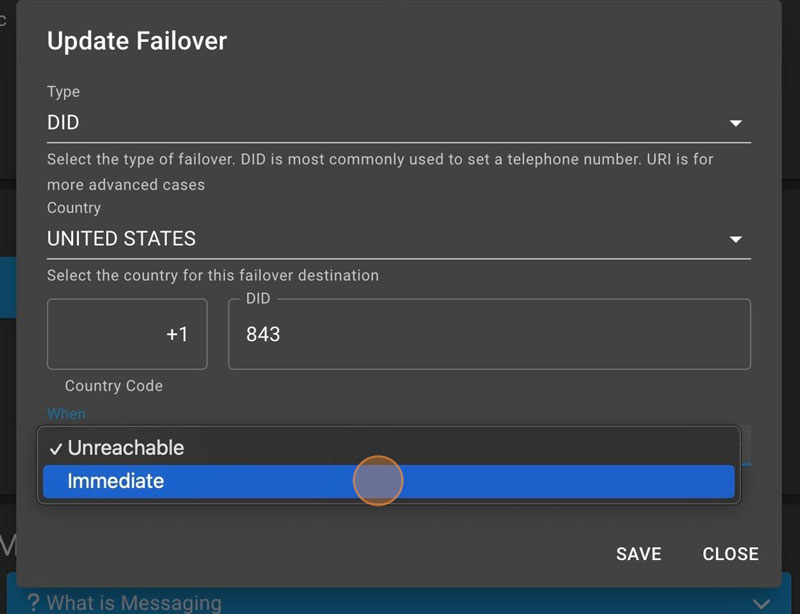
Click “Immediate”

11.
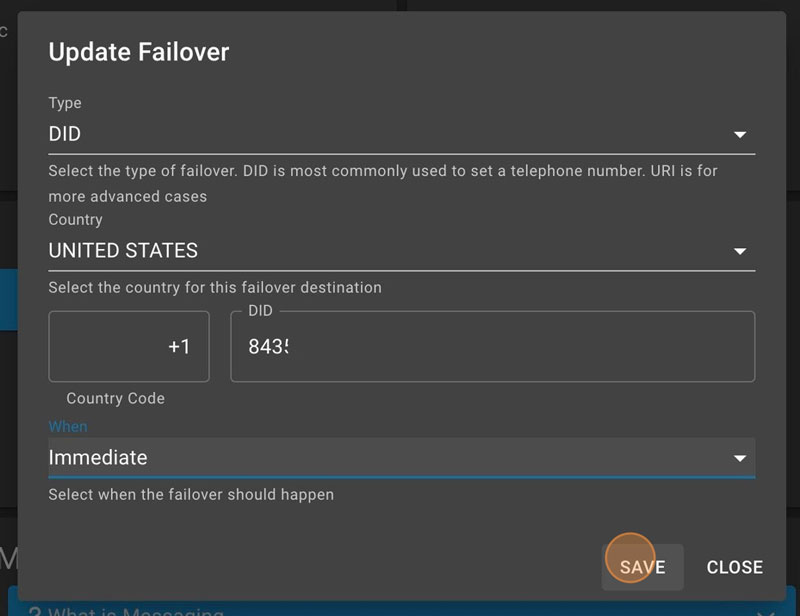
Click “SAVE,” and your calls to that number will be immediately forwarded.
12.
To reverse the process, click on the edit button.
13.
Click “DID”
14.
Click “None”

15.
Click “SAVE”